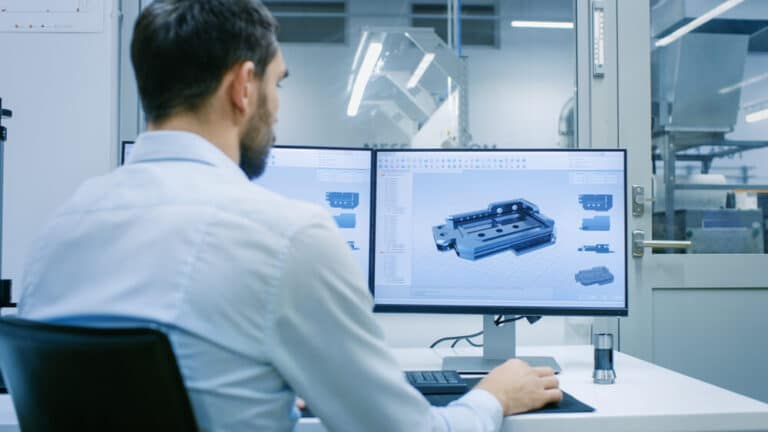
If you have been investigating how to bring a product idea to market, you have probably heard the word design a hundred times. It can be a noun referring to the documentation manufacturers will refer to when they make your product. Or it can be a verb — the act of determining what goes into that documentation. That is why many people think doing product design consists of making drawings.
That is part of the process, but only a tiny part. There are widely accepted product design steps that companies across industries use to guide them through the rest of the design process.
Product Design Is More than a CAD Model or Drawings
Product design is also about making sure your product has the features that customers derive value from, that can be manufactured, and that costs less to make than people are willing to pay for it. The documentation is just the end result. What differentiates your new product is the creativity, problem-solving, and testing that goes into the product.
Product design is at the heart of the process that everyone uses to create a product. In the early steps of that product development process, you use market research to understand and capture what your customers want and why they want it. It’s the “what” and “why.”
In the next steps of product design, you figure out the “how” and capture it using standardized forms of documentation, plus define schedule, costs, and resource planning. Once that is done, you actually make your product.
As you can imagine, if you miss something in the product definition that is the result of the design phase, you won’t end up with a product that does what your customers want.
Most entrepreneurs don’t realize how vital or time-consuming product design can be. They are only aware of the documentation part, and often don’t budget enough of their startup funding to develop the product entirely.
But don’t worry, this is not a black box that you feed money and time into. It is a well-understood process with well-accepted product design steps. If you take the time to understand those steps, you will plan better, know if your design team is taking shortcuts, and prepare for the true cost.
Lessons Learned on How to Use the Product Design Steps Properly
Lesson 1: The Cost of Change Only Goes Up as the Design Solidifies
One of the reasons why the product design process has discrete steps is so the design team can review the design at every one of those steps and fix any problems as soon as possible. You want to fix them early because the cost of making changes goes up with each step in the product development process. Changing a design sketch is easy. Changing all the detailed documentation is time-consuming and therefore expensive. Changing manufacturing tools can be devastating. The best practice is to take the time to find and fix issues as early in the process as possible.
Lesson 2: Excellent Product Design Incorporates Manufacturing at Every Step
Nothing can doom a project faster than getting an email from your manufacturer saying, “we can’t make this.” The way to avoid this pitfall is to leverage something called Design for Manufacturing or DFM. At every step of defining the product, someone on the design team needs to evaluate how the product will be made. And every time the team decides on a design feature in the product, they should consider how hard or easy manufacturing will be for each option evaluated.
Lesson 3: Product Design Is an Iterative Process
This is the hardest lesson for many entrepreneurs to learn, especially for startups that are eager to get to market. What product development teams have learned over and over again is that iterating on a design is the best way to get a great design. This requires prototyping, testing, getting user feedback, and then modifying the design. Many entrepreneurs envision the design process as a straight road going from idea to manufacturing. Instead, think of it as a road with lots of roundabouts where you drive around multiple times until you get things right. And sometimes, you may even head back to an earlier step.
The 5 Product Design Steps

Step 1: Understand Requirements
The key to deciding “how” a product will do “what” you want it to do involves understanding the “what” part. The list of “hows” is usually called the design requirements. Before the design process begins, the marketing team should leverage user research and market knowledge to gather and document product specifications — the “what” and “why.”
If needed, the design team should conduct their own user interviews, map the user journey for different user personas, and get a firm grasp on what the user experience should look like. This can be done with individuals, groups, or through online surveys. Every stakeholder on the design team should understand and approve the requirements.
During this step, the team also surveys the intellectual property landscape, gathers market insights, identifies competitors, and summarizes the technology needed to succeed. It is also the ideal time to step back and do a feasibility study to make sure that before more investment is made, the idea behind the product is feasible from a technical and market perspective.
The product development team studies all this information and translates market needs to features in the product into the product requirements document, or PRD. Just taking the output from market research is not enough. All good design systems translate that research into product requirements and then design features.
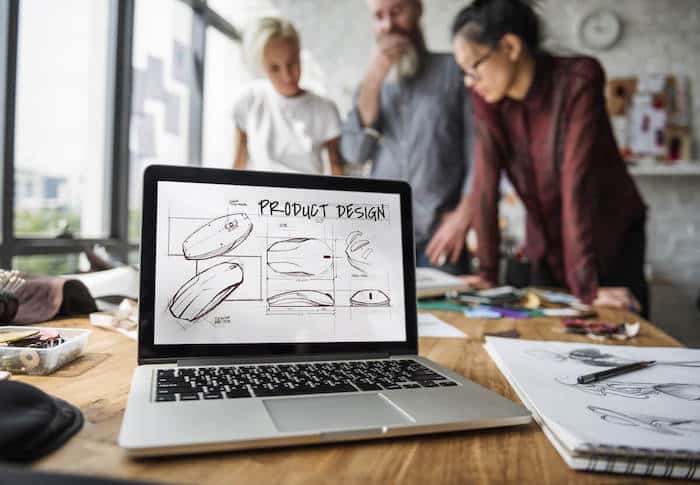
Step 2: Create Conceptual Design
The next step is the most creative and can be the most fun. Conceptual design is where you turn the requirements into ideas for the design. This process starts with ideation, where industrial designers sketch the shape and look of the product. They’ll usually come up with several different concepts, and it is not uncommon to hire more than one industrial designer to go through ideation on several different concepts.
In the early stages of product design, brainstorming is usually used to go back and forth on various design concepts until a design solution is found. For the physical aspects of your product, this is done with sketches or simple 3D computer models. The methodology used is not as important as keeping things creative while keeping the point of view of the target users in mind.
If your product includes software, that part also needs to go through the same concept design process. But instead of sketches, the team explores different options for user experience (UX) by creating simple drawings of what the user interface looks like, called wireframes. Multiple wireframes show several user flows through the UX design, a representation of what a target user might see as they interact with the software.
Next, the team will downselect a concept and define more details. This step aims to define the design well enough to allow a prototype to be made, but not so detailed that making changes is expensive. The amount of detail really depends on how complex your product is and how simple your prototype can be. If you can build a prototype out of duct tape and cardboard, then you don’t need a lot of detail. If you have to create a complex assembly to test your product, you need a lot more detail.
This is where the team will start to estimate what things will cost and how long it will take to get the product to your customers. The cost of material, labor, manufacturing, and shipping and along with time to market are just as important as product capabilities to the success of your product. This is also where you, as an entrepreneur, will get a realistic look at how much money and time this is all going to take.
Some design teams will choose to define a minimum viable product, or MVP, at this point. This is a product that has enough functionality to get feedback from users in the target audience. This concept is prevalent in the development of digital products like software. But MVPs can also be used for physical products. The advantage of using an MVP is getting feedback before you spend money on a detailed or final design.
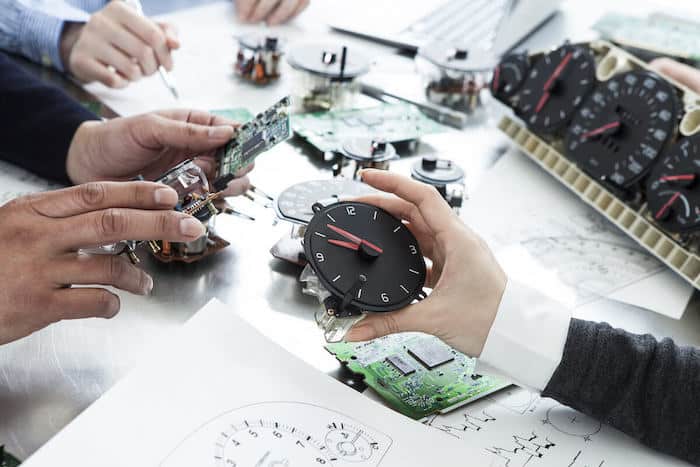
Step 3: Make Prototypes and Test

Once the prototypes are made, the product development team starts to test it. Most projects test form, fit, and function. Testing the form allows the evaluation of what the product looks like — the aesthetics and the style of the product. You then test fit to ensure everything goes together and the size and interaction of different parts are sound. The last and most important testing phase is functional testing. Here you evaluate if the design can do what the product is supposed to do. A test is created for every design requirement.
This testing includes the user interface (UI) on any software used in the product. UI design testing is critical for the same reasons physical testing is done. The prototypes can be actual software or a mockup that still represents the user flows through the UX design.
Much of this testing is done in the lab to gather metrics on the product’s performance. This step can also involve usability testing with potential users. Team members can be used, but real users will provide much more valuable feedback if actual user testing is possible.
And remember the lessons learned above? Prototyping and testing is not a one-time thing. You feed the results from testing back into the conceptual design. The design is updated, and you repeat prototyping and testing. The team repeats this cycle until all the design requirements are satisfied.
Step 4: Form Detail Design
Once the conceptual design is nailed down, it is time for the team to go back and figure out all the details they passed over before. You downselect any off-the-shelf components at this point. Materials, geometry, and various components are optimized. Also, this step includes a detailed cost analysis, and various alternatives are evaluated to minimize cost. Manufacturing concerns now play a more prominent role, and the design is changed to maximize manufacturability. The schedule is also refined and agreed to by everyone involved.
Just like the conceptual design, detail design is iterative. Remember the idea of roundabouts? Most product development projects go back to Step 3, Prototype and Test, several times as they work out the detail design until all the stakeholders are satisfied.
This is where you, as the entrepreneur, need to make sure you are happy with everything. It is also an excellent time to get outside people to look at the design as part of a design review. You can still make changes in the detail design step, and it won’t impact cost and schedule much.
Step 5: Establish Final Design
Moving into the final design step means that everything is now locked down. If you need to make any changes, you have to go back a step, change the detailed design, and then prototype and test.
The output from this product design step is a complete documentation package. Everything the manufacturer needs to know must be documented. Drawings, CAD models, bills of materials, and quality control requirements are created and reviewed by the team. Costs are finalized and the manufacturing schedule is solidified. Also, make sure there is some sort of review and signoff process for the final design.
If you are not someone versed in product management, the final design can be a frustrating part of the design phase. However, delivering a successful product is completely dependent on the final design step. It is how everything done in the previous steps is captured and transferred. You won’t get the new product that meets user needs unless the people who are making the product know everything your product team decided.
When all those documents are ready and approved, product design is done, and you are now ready to go to manufacturing and work towards shipping the finished product.
Follow the 5 Product Design Steps and Work With a Team That Gets It

The product design process is not a philosophical concept. It’s the way everything from thumbtacks to interplanetary probes is designed. Most product design disasters happen because someone decided to skip or take a shortcut around a step. The result is a product that doesn’t have the features users want, costs too much, gets to market too late, or breaks. And if you think fixing a design in the detail design step is expensive, get a quote to change your tooling to fix a problem after manufacturing starts. Or worse, when your product is in the field.
The best way to make sure your product development process goes smoothly is to work with a team that lives and breathes the product design steps. One way to find out if they get it is to ask to review your team’s product development plan. It should include:
- Steps similar to the product design steps listed above
- Design for manufacturing
- Prototyping and testing
- Budget and schedule for multiple iterations
- A list of what the product documentation contains
If any of those are missing, ask for more details or why that aspect of the product development plan is missing. If they don’t have a good answer, it’s time to change up your team.
Working with a partner like Gembah, a company that is obsessed with the entire product development process from research through managing manufacturing, can save you considerable time and money. Our design experts understand the details of design thinking. It is much better to get stuck in a roundabout with someone with the breadth and depth of experience to know when to go forward, back, or stay in an interaction loop. Get started on getting your product to market by sharing your product idea with us.