TL;DR: The product prototype development process turns your idea into a functional model that can be tested, validated, and refined before full-scale manufacturing. This guide walks through each phase—from feasibility research and design iterations to alpha/beta testing and final prototyping—so you can reduce cost, validate usability, and create a manufacturable product.
Have a great product idea but not sure how to bring it to life?
One of the initial stages in the product development process is building a functional prototype. A prototype will let you turn ideas and visions into an actual product you can use for user testing, product feasibility validation, and additional research.
In this guide, we’re going to cover all things product prototype development and walk you through how to prototype a product.
We’ll dig into what prototyping actually means, why the prototyping process is so crucial, prototype design—we’ll even touch on the broader product production process.
Let’s jump in.
What Is Prototype Product Development?
Prototyping is an invaluable component of product development. A prototype helps a developer visualize a product before it goes into mass production.
A development team or engineering team is looking for information to determine whether their idea is technically feasible and if buyers will find the product attractive and valuable enough to purchase.
The prototype product development process involves proof of concept to test the idea and then creating a model of the product to test functionality and desirability.
With rapid prototyping especially, the innovator is constantly asking:
- Does it work?
- Does it look good?
- Does anything need to change to make it better?
Entrepreneur says, “Proof of concept says that it can be developed and validates the technical feasibility whereas a prototype shows a potentially buggy, unrefined attempt at the final product.”
This makes the process iterative.
No product idea comes to life without multiple revisions, as creators reimagine their product based on research, testing, user experiences, and customer feedback. Revisions can involve anything from changing aspects of the product design to modifying the materials used, all to ensure the final product is desirable and manufacturable at a cost that leaves room for plenty of margin.
Even the most detailed product drawings or software mockups will not render the same information as a physical prototype. Prototype product development gives you a greater sense of the dimensions, design and how the final product will look and function.
What Is The Purpose of a Prototype?
The primary purpose of building a prototype is to save money and time in the long run. The more you know before you invest in mass production, the better decisions you can make to avoid pitfalls.
The prototype phase in product development is your way to do four essential things:
- Validate your product idea: The product should solve a consumer problem.
- Test functionality: The design must result in a product that performs as intended.
- Iterate until it’s right: The prototype isn’t final until the product passes all tests. Prototyping lets you make design refinements without all the production costs.
- Prepare for manufacturing: The design specifications will give the chosen manufacturer what they need for production.
With 95 percent of new products failing, prototyping is your opportunity to work out the kinks early on to avoid wasting resources developing a subpar product that could have been great “if only.”
When you evaluate a prototype, you are looking at every conceivable element of the product.
- Materials
- Size and weight
- Features
- Texture
- Colors
- Form of the product
- Overall Appeal
The list goes on. You want to get into the head of your target buyer to imagine what they would think about your product. This becomes much easier when you’re working with a 3D model, an electronic prototype, or an actual finished product.
Depending on the product type, you should ask yourself and others in a test group dozens of questions, such as:
- What does it feel like in my hand or to use?
- Are the components easy to reach and handle for my typical buyer?
- Do the parts stay attached, turn without too much effort, or move how they should?
- Does my product do what it is supposed to do?
- What could possibly be wrong with my product?
Recommended Reading: Go from Good to Great with Killer Product Design Services
The Prototype Development Process: How To Prototype a Product
You don’t just hand a manufacturer a sketch and expect them to produce a prototype. In fact, most of your work will be on the front end, way before you ever see a product prototype.
The prototyping process can be broken down into three phases.
Phase 1: Define the Product and its Feasibility
When you have a new product idea, you have to know if it is feasible before you can move to the next phase. This proof of concept phase includes a significant amount of research, as well as your first drawings.
Research
Research is your best friend, accessing as much market, product and customer data as possible to learn whether your idea is worth the investment. Even if your product idea succeeds in the development process, it doesn’t mean it will make you money. Approximately 40 percent of products never become profitable.
Insights Association says, “Too often companies move forward with new products based on a hunch. They have an idea, see value in it and decide to progress with the development of a product without thoroughly exploring the market for that product.”
Research involves qualitative and quantitative research, using sophisticated tools that help you analyze an idea for consumer desirability, manufacturability, marketability, competition, pricing sweet spots, margin opportunities, and much more.
The key to research is approaching it agnostically to get an unbiased perspective versus trying to justify data to fit what you want it to say. For instance, you want to know if the margins are there or not because you’re in this to make a profit. You can easily convince yourself and others that the margins will be there when you find a manufacturer who can produce your product at a lower cost.
Unless you have reliable data proving there is, in fact, a manufacturer willing to do this without sacrificing quality, you risk developing a product that brings little to no margin or profit.
Recommended Reading: Research and Product Development: How to Research and Vet a Product Opportunity
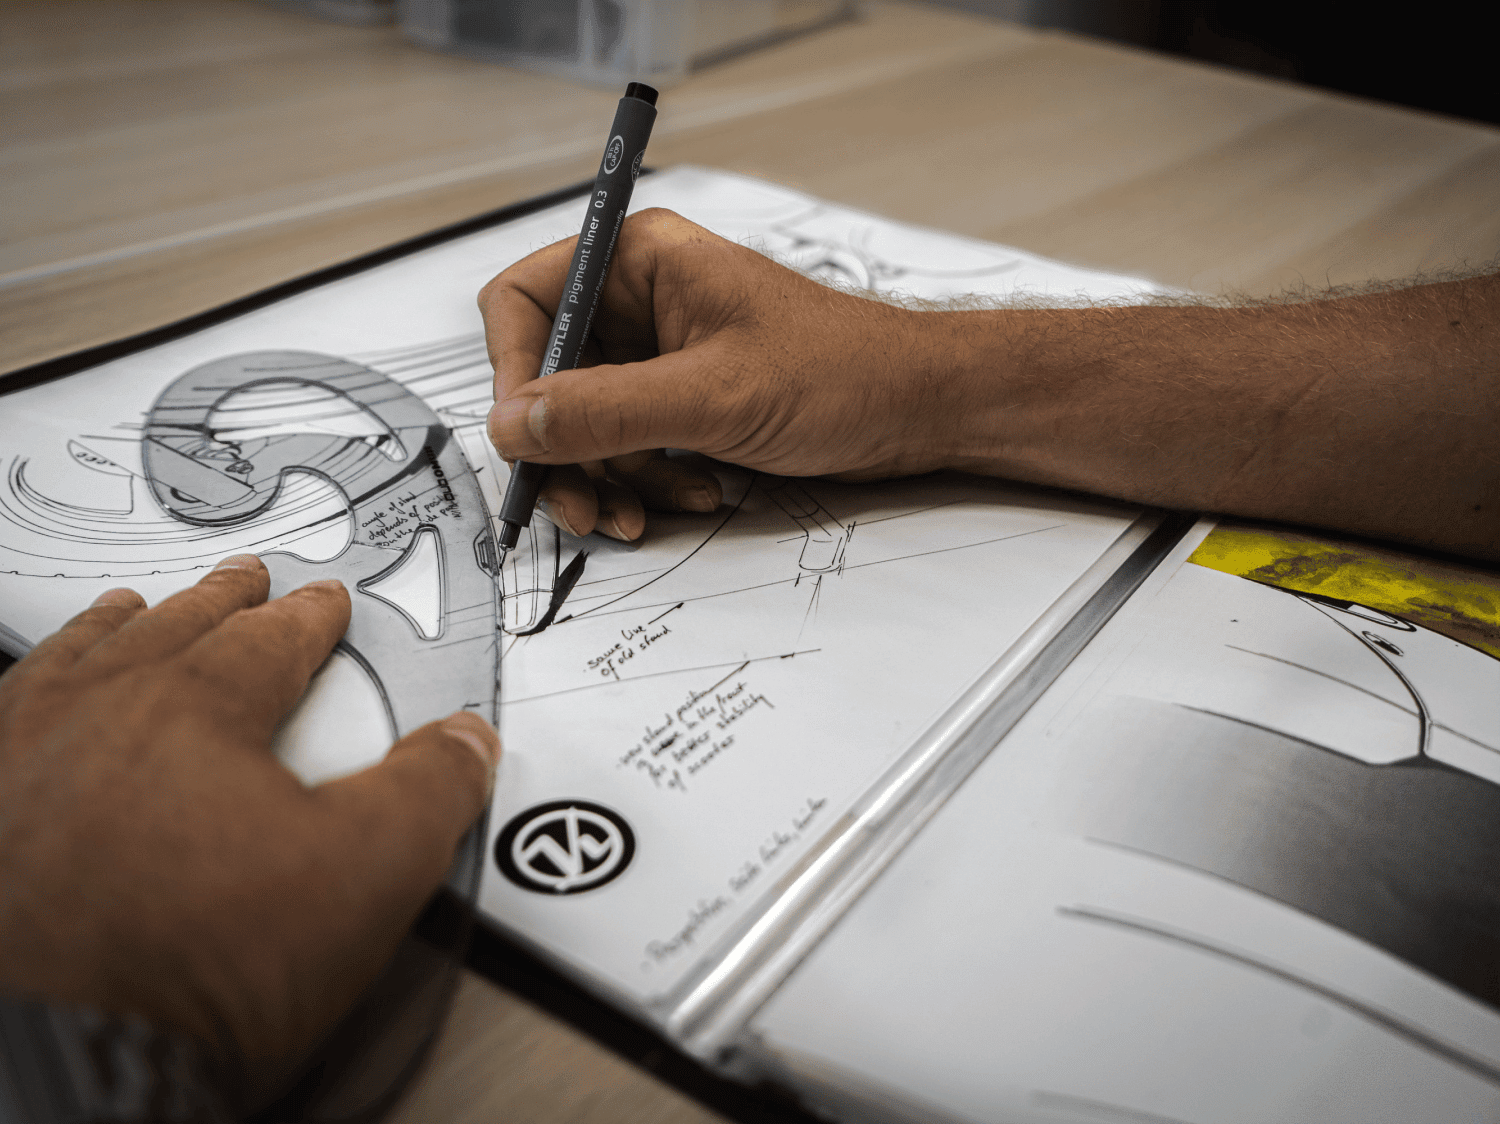
Initial specifications and drawings
Once you have conducted your research and know you have a viable product idea, it’s time to start putting your idea on paper. This will help you build your initial prototype.
You can draw something out yourself; however, you will likely need to engage professional product designers to render a more formal drawing.
Your designers will work with you to draw out your idea based on your specifications. A note of warning: be sure your designers have experience designing products like yours. They will be able to guide you through decisions using their best practices and lessons learned from previous, similar projects. You will want to lean on their expertise, such as informing you that the material you want will cost more to source or be too heavy compared with another option.
You will go back and forth with your designers through multiple iterations until you have a design that is ready for the next phase.
Phase 2: Detailed Designs
With the design process underway and initial drawings in hand, you are ready to engage engineers and, perhaps, additional or the same product designers.
Given the prototyping tools, software and machines these specialists have at their disposal, they will be more detailed in their drawings and give you 2D and 3D models and renderings. You may or may not require the engineering component, or you may require multiple types of engineers. They will bring a different perspective to your product and are a great asset when determining manufacturability.
Alpha & Beta testing
Think of prototype testing as an iterative process.
Alpha development and beta testing in particular will give you multiple prototypes to evaluate. You can think of alpha testing as the most rudimentary of all prototypes. It is less concerned with appearance and more focused on functionality.
It will also use the most inexpensive materials to keep your investment low at this point. Remember you are going through this process not only to prove you have a great product idea but to disprove it. Poking holes in your idea is the best way to create a full-proof design.
The next stage of alpha testing considers appearance. The prototype won’t function, but it will give you a good idea of what the finished product will look like. Engineers will use 3D printers and higher quality materials at this point to render a realistic model of your product design.
During the alpha testing phase, you will conduct a risk analysis, answering questions such as whether the materials are affordable and sustainable. Your goal is to identify any threats to product development, your supply chain, and profitability.
Beta testing will give you the opportunity to look at a fully-functioning, engineering product prototype that you will then take to your sample target market to test. Gathering their feedback on its appearance and functionality, you will be able to go back to your design team to continue the iteration process until you have a tested and approved production prototype.
Phase 3: Final Design
The final phase of prototype product development results in a manufacturer-ready product design.
This includes a pre-production, high-fidelity prototype and detailed specifications the manufacturer will need to begin mass production.
Once you source a manufacturer, you will need to define the metrics that determine quality. You can measure your manufacturer’s performance based on those quality standards.
Supply Chain Brief says having a Perfect Order Performance (POC) level of 95 percent is the “sure sign of a customer-driven manufacturer excelling at what they do.”The American Productivity and Quality Center (APQC) defines POC as flawlessly taking and fulfilling a customer order, and includes taking the order correctly, allocating inventory immediately, delivering the product on time and sending an accurate invoice.
Can I Hire a Company to Create My Prototype?
Some businesses attempt to create their own prototype before engaging designers; however, few are able to conduct the proper research beforehand to inform their design.
By engaging a product development firm on the front end, you can not only have access to designers and engineers but the required research tools.
Remember that research is critical before you begin the prototype development process.
We recommend you work with a firm that offers a range of research tools and guidance so you know what to research and how to leverage the tools.
Once you complete the research phase and are ready to begin the design process, that same firm should have a network of designers and engineers experienced in designing products like yours. Again, this is essential, as it will streamline the iteration process, reduce the time to final design, and lower your costs.
The firm should also be able to recommend vetted manufacturers that are experienced in producing products like yours. As with the designers and engineers, having manufacturers that use best practices for your specific product type can reduce your costs and result in a higher quality product.
Above all, work with a product development firm that provides expert guidance throughout the entire process. They will ensure you are following the right steps at the right time and will be there to answer any questions along the way.
Get in touch with our team to learn more about prototype product development and get help navigating the process.