Have you ever been chatting with friends at a restaurant, and an idea so great comes to you that you grab a pen and a napkin to start drawing?
This is the most fundamental form of product design sketching.
It’s the act of turning an idea in your head into a graphical representation that captures what you were thinking, allowing you to convey those thoughts to others. The phrase “a picture is worth a thousand words” rings true with product design sketches.
Product design sketches are the fundamental tool of industrial design and a useful instrument for almost every step of the product development process. When used properly throughout the design process, sketches compare and convey concepts and configurations quickly and efficiently. Even if you’re not an industrial designer, taking a bit of time to develop the fundamentals of sketching means you can capture and convey your ideas more effectively.
In this article, we’ll cover types of sketches and explain how they are used to drive new product innovation. We’ll also offer drawing tips to help you develop some basic sketching skills.
What Is A Product Design Sketch?
A product design sketch is a quick, hand-drawn illustration that captures an idea for a product. It’s the act of turning an idea in your head into a graphical representation that conveys your thoughts to others.
These sketches are the fundamental tools of industrial design and are used throughout the product development process to compare and convey concepts quickly and efficiently.
Unlike precise engineering drawings, product design sketches are rough and flexible, allowing for rapid iteration and creativity. They help visualize concepts, explore different design options, and communicate ideas clearly, making them an essential part of the creative process.
The Different Types Of Product Design Sketches
Although the term “sketch” makes us think of a pencil drawing, in product development it refers to a graphical image that is not precise.
Engineering drawings and models are precise records that tell the design and engineering team exactly how the product should look.

A sketch is purely a visible suggestion.
It’s also a way to exercise design thinking and lean product development without going to the extremes required in engineering documentation. Here are the most common different types of sketches throughout the process:
Drawings or Doodles
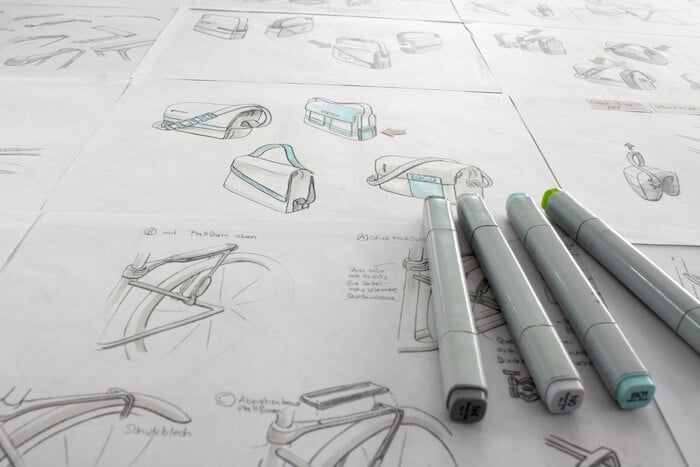
The simplest sketch form is a doodle done by hand on paper—usually made up of lines and maybe hatching or shading. At this stage, you’re just trying to bring abstract ideas to life from what’s in your mind.
Renderings
You move into renderings when adding color and more detail, like specifying materials and textures. At this point, you’ve gone from capturing the basics to conveying how the product will look.
Computer Sketches
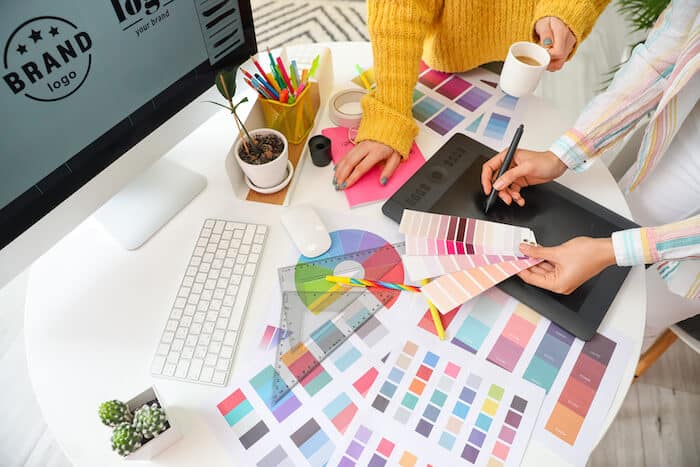
Sometimes, sketches are done on a computer, using the automation and precision of software to create images with easier accuracy quickly.
3D CAD Models
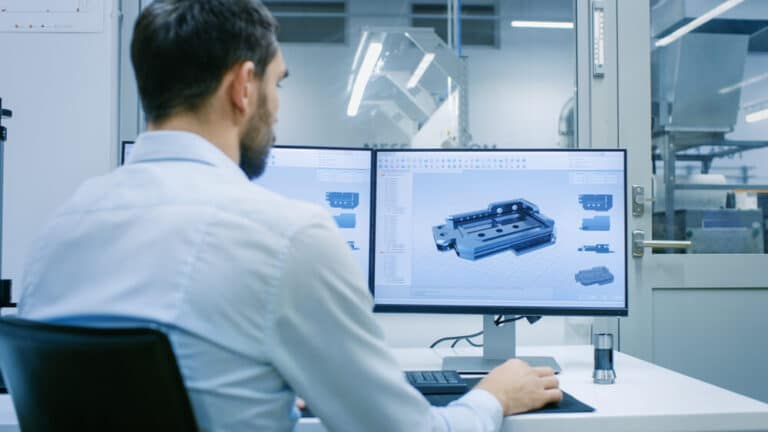
You can also use design tools to create 3D computer models, known as computer-aided design (CAD) models that are truly 3D rather than perspective drawings. You can also input CAD models into rendering software to create photorealistic images of your product.
How To Create (And Use) A Product Concept Sketch
Creating a product concept sketch is an essential step in bringing your ideas to life. These sketches help you visualize your concept, explore different design options, and communicate your vision clearly to others. Here’s how to create and use a product concept sketch effectively.
Step 1: Ideation
Sketches are most commonly used during the ideation phase of the product development process when the team explores the overall look and feel of the design.
This type of product design sketch aims to iterate on many different design concepts quickly. It needs to convey just enough information to capture a concept and help the design team make decisions—e.g., two or three buttons, a ridge around the product or flush, a square or curvy shape.
Step 2: Configuration
Once you decide on the basic look and feel of the product, it’s time to create sketches that explore and capture its configuration.
Use perspective drawings or 3D models to decide the size of the product and its features. How do different parts fit together? What does the human interface look like, and what do users see as they interact with the product?
Step 3: Design
Although the final product of the design phase in the product development process is engineering documentation, sketches still play an important role. At this point, sketches are often made with the engineering CAD models. The team can quickly explore different fit, feature, and function options without building a prototype.
Step 4: Marketing
The final use of sketches in the product development process is for marketing purposes. Nowadays, photorealistic rendering is so accurate that you can create product sketches that look exactly like the final product. Even if you’re working with hand sketches or shaded renderings, they’re an effective way to get customer feedback and promote the product.
How To Find Product Sketch Ideas & Inspiration
Coming up with ideas for product sketches can be challenging, but with the right approach, you can unlock a world of creativity. Here are three effective methods to help you find inspiration and generate fresh ideas for your sketches.

Observe Your Surroundings
Inspiration is all around you.
Take a walk, visit a museum, or simply look around your home or office. Pay attention to shapes, colors, and patterns in everyday objects and architecture. These observations can spark new ideas for your product sketches.
Carry a sketchbook or use a note-taking app on your phone to capture ideas as they come. This practice helps you turn spontaneous thoughts into potential designs.
Analyze Existing Products
Look at products that are similar to what you want to create.
Visit stores, browse online marketplaces, and read product reviews. Focus on what users love and what they complain about. By understanding the strengths and weaknesses of existing products, you can brainstorm ways to improve them or combine their best features into a new, innovative design.
This method helps you ground your creativity in real-world needs and preferences.
Collaborate and Brainstorm
Working with others can boost your creativity.
Engage with colleagues, join design forums, or attend industry events. Brainstorming sessions with others can generate a flood of ideas that you might not come up with on your own. Use techniques like mind mapping or the SCAMPER method (Substitute, Combine, Adapt, Modify, Put to another use, Eliminate, and Reverse) to explore different angles and expand on initial ideas.
Collaboration helps you see things from different perspectives and enhances your creative process.
How To Work With A Design Expert To Create Useful Product Prototype Sketches
Working with a design expert can help you turn your product ideas into reality. By combining your vision with their skills, you can create detailed sketches that accurately show your concept. Here’s how to team up with a design expert to make useful product prototype sketches.

1. Develop a solid idea of what the concept you want sketched
Start with knowing where you want to end up. The purpose and audience of a given set of sketches should drive how much time you spend with your industrial designer and how detailed the sketch should be. In this step, you will work with them to explore design ideas in a process called ideation.
2. Add flesh to your ideas with basic product prototype sketches and simple renderings
Initially, the designer tries to capture the “big picture” items — size, shape, and basic features. Don’t waste time on intricate details or making things attractive. Just capture ideas. Think of this step as a concept sketch and explore different options.
3. Group key features and solidify the product sketch’s style
Once you have determined the size and shape, provide the designer with a list of necessary features. Displays, buttons, hand grips—i.e., all things that give your product functionality.
Work with them to create detailed product concept sketches and renderings that define the product’s function and appearance. At this point, your designer will create realistic images. You and your team can use the renderings to make decisions and share them with other teams in your project to convey your design ideas.
4. Move into 3D and CAD renderings
To capture more information about your product, your sketch should include details that reflect how it will be made and assembled and what materials you will use.
Have the design add notes or attach samples to show material choices. An experienced artist can do this with color 3D renderings or photorealistic renderings of a computer model.
5. Show product functionality functionality
The last and most detailed form of product design sketches are renderings that describe the product’s functions.
This can include multiple images that show movement, pictures that show people or parts of people, or renderings that convey the environment in which you plan to use the product. Ask your industrial designer about animations and if they will help convey the product’s functionality.
There is a difference between industrial design and product development. Industrial design maps out the customer experience, while product development starts with industrial design and then fully defines the product. Sketches are the key tool for the industrial design process and provide information for the product development process.
Start Capturing And Conveying Your Product Ideas
industrial designers can create professional images that directly impact the sales and profitability of your new product.
When you are ready to bring in professionals, finding the right people is exactly what we designed Gembah’s marketplace to do.
Hundreds of industrial designers and graphic designers are available through our platform, and our experts are here to help you on your journey. Reach out to us today and let us know your product idea. Maybe even send us a picture of that napkin sketch.
Save sketches as you work your way through the product development process, too. They’re fun to look back on and a great way to review the creative process that resulted in your new product.
When your product goes huge, those sketches will be priceless.


