Think of the last time you used a product that took your breath away. What was unique about product design? How did it make you feel? What about the aesthetics that caught your attention? Did the color pop? Was it a unique shape you couldn’t have imagined, but made sense? Or, was using it easy and seamless?
No matter what emotion the product caused, you need to find an industrial designer to thank. They deserve it for a job well done. The ability to elicit emotion is the importance of industrial design. Form, fit, and function drive emotional responses from people who use a well-designed product. The visual appeal of the product encourages someone to give it a shot, who may not have otherwise.
For example, futuristic-looking wine openers like the Rabbit you can use to open a bottle with one hand. Or the Motion Pillow that has a sleek design but is also packed inside with features that track and analyze your sleep patterns for more restful sleep.
After using these, I doubt you’d be turning back the older versions. Intelligent industrial design leads to loyalty.
What is Industrial Design?
Industrial design is the process applied to mass-manufactured goods. Industrial design hasn’t always been a focus for those who develop products to take to market. It’s a relatively new discipline, with roots in the Industrial Revolution, but mass adoption not taking place until the late 1910s.
It’s important to consider how we got here to understand how product design became such an essential part of brand development and industrial growth.
—-
Takeaway: Today, product design is essential for the success of modern companies. Companies like Apple, IKEA, and Zara have built empires on a design-forward mindset. Functionality still matters but takes a backseat to an eye-catching design.
—-
History of Industrial Design
The public’s desire for efficient, standardized, and functional products is central to the history of industrial design. After World War I, the United States experienced rapid technological advances and industrial growth. Concurrently, New Zealander designer Joseph Claude Sinel coined the term “industrial design.” Companies around the world began to think of industrial design as a school of thought.
During the 1920s, industrial designers applied design to automobiles, trains, and electrical appliances before these products were mass-manufactured. This new design practice would eventually usher in an era where aesthetics mattered as much as functionality.

From 1930-1950, however, efficiency was king. Production efficiency and cost-effectiveness briefly replaced aesthetics with the onset of the Great Depression and World War II.
This shift lasted a few decades. Since the early 1960s, American culture has been obsessed with the role form, function, and fit play in a product’s attractiveness. Over the past few decades, product design has been a powerful driver of company success. Some of the world’s most influential and powerful companies lead due to a consistent design voice.
—-
Takeaway: Good design helps companies succeed. No one wants to buy ugly but functional products. There has to be a marriage between style and utility for a product to be attractive to your potential buyers.
—-
What is Design Thinking?
First mentioned by Nobel Prize winner Herbert Simon, in his 1969 book, The Sciences of the Artificial, design thinking is a non-linear process. The process seeks to understand who will use a product and identify problems that aren’t obvious on the surface which the product can solve.
Design thinking has earned popularity in both business and design circles. Particularly among people who think about the role products play in our world.
It also helps challenge ideas about who wants certain products and why they want them. Companies want to avoid making products people aren’t going to use. An unfortunate mistake many companies make is to create new products because they are possible, or from what sounds cool or trendy at first glance, without considering the product’s utility.
This can lead to costly mistakes.
Google Glass is the most notorious example. It was maybe a cool idea, but the assumption people would want constant internet access, and computing features from a pair of glasses, turned out to be deeply flawed.
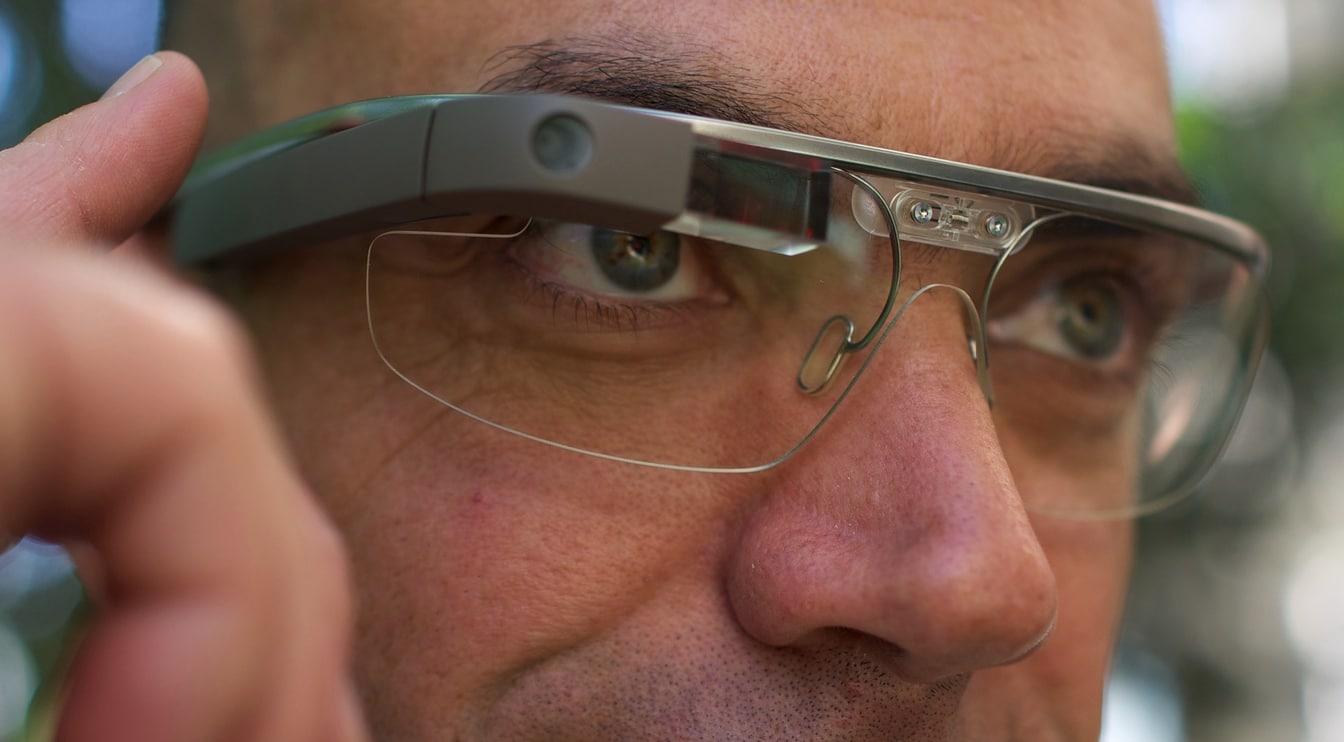
There were safety issues related to the radiation the glasses emit being so close to your skin. Also, the potential Glass could illegally copy movies in theaters, their clunky features, and general lack of utility.
Simply put, Google Glass was an underdeveloped idea. Therefore, the execution of the product didn’t have a chance. This trap is one to avoid when diving into design thinking.
—-
Takeaway: Design thinking helps industrial designers consider how a product can solve hidden problems. It also uncovers ideas for impactful products which previously seemed unnecessary.
—-
Design Thinking as a Non-Linear Process
Design thinking doesn’t follow a straight line. Much like a winding creek that crosses all types of terrain, industrial designers don’t follow a well-worn path.
Design thinking considers several very human processes.
These four questions are important to ask:
- How do people use the product?
- Why should this product get created?
- Who is the target user?
Industrial designers who empathize with their customers’ needs start to understand how to address those needs. Creatively solving problems requires assumptions to be challenged. There’s no reason to do something because “that’s how we’ve always done it.” Instead, a deeper dive can reveal some valuable insights.
Why create a product that doesn’t have a noticeable impact? There are too many products that don’t serve a purpose. They simply exist because they exist.
Understanding your target audience and how they will use your product is essential to understanding the product’s core function. The surprising part is that your target user can be different than who you initially believe them to be.
Next, let’s take a closer look at the ideation process that’s central to design thinking.
—-
Takeaway: Design thinking doesn’t occur in a vacuum. There are many human factors involved. Being empathetic allows industrial designers to put themselves in their customers’ shoes and challenge assumptions that lead to fresh solutions.
—-
The Five Phases of Product Design
To best understand how product design unfolds, it’s a good exercise to look at five phases:
- An Empathetic Understanding of the Problem
- The Design Problem Statement
- Product Ideation
- Prototype Development
- Product Testing
An Empathetic Understanding of the Problem
According to Merriam-Webster, empathy involves being aware of, being sensitive to, and vicariously experiencing the feelings, thoughts, and experiences of another person without having the feelings, thoughts, and experience fully-communicated to you explicitly.
It’s the ability to put yourself in another person’s shoes and understand what they are feeling without them telling you directly it’s how they feel.
There are several methods which Stanford University’s d.school outlines that help designers empathize with potential customers:
- Assuming a beginner’s mindset
- Developing user-based studies
- Engaging with “extreme” users and
- Bodystorming
Assuming a Beginner’s Mindset
Assuming a beginner’s mindset is simple: Don’t bring assumptions into the design thinking process. Our assumptions inform how we make decisions. These assumptions are important in our daily lives. However, the opposite is true in the design thinking process. If you have your own assumptions about impactful design that cloud your vision, you can’t also be empathetic to other people’s needs. The two mindsets don’t work well together.
Developing User-Based Studies

It’s fascinating to document how people experience tough situations. User-based studies include taking photos or videos – with consent, obviously – of people struggling with a problematic situation your product could solve.
You can also document what people said during the experience, how they were feeling, and how they were acting. When you understand how people struggle with an issue, it helps develop empathy for that struggle and to think about how your product can make lives easier.
It’s also essential to engage with your “extreme” users to get an idea of what makes them tick. These users will be early adopters and loyal customers.
Engaging With Extreme Users
Although extreme users may be a small part of your target market, they can still say a lot about product design. If you can empathize with this small group, it’s easier to understand your broader base of customers. Once purchased, extreme users would take advantage of every feature of your product. Let’s assume your product is a dinner table that’s comfortable for four people. But, it is extendable using a leaf and extensions at each end of the table. Your extreme user would be sitting ten people at that table because they have a large family that likes to eat dinner together several times a week.
Understanding your extreme customers makes it easy to solidify your product’s unique value to the market.
Bodystorming
Bodystorming helps you empathize with potential customers. In this process, you interact with a product prototype under conditions and in a similar environment where your customers would use the product. By experiencing a product as a user would, you can see the struggles and challenges they may encounter.
This process helps to fine-tune details which will make a user’s experience more positive and seamless. When you have empathy for your target users, it’s easier to understand the problems your product will solve for them. People’s desires aren’t always what they seem. Bodystorming helps to solve this puzzle.
—-
Takeaway: Developing empathy for your product’s target user makes the problem-solving process easier.
—-
The Design Problem Statement
Uncovering the design problem you are facing involves some mind-reading. No, we’re not saying you need to develop Extra Sensory Perception. Although it would be fun, right?
You need to think about the unconscious desires people have your design can address.
Developing a formal design problem statement helps you work through uncovering these desires. There’s a brilliant example of this in a famous Henry Ford quote: “If I had asked people what they wanted, they would have said faster horses.”
The supposed problem was slow horses; Ford’s solution was automobiles, not faster horses. The actual underlying need was to get places faster. Lack of speed was the real problem. In other words, there’s a more deep-seated need people have, which your product design addresses. They aren’t yet aware of what they need. Therefore, it’s your responsibility to define the problem, then treat it with a solution. When you treat a problem with a unique, problem-solving product, you’ve won a loyal customer.
It’s essential to consider a few things when writing a design problem statement, namely the four W’s and the five “whys.”
The Four W’s of the Design Problem Statement
There are four “W questions” to answer:
- Who is affected? The answer is your target product user.
- What is the problem? What’s standing in the way of the ideal experience and what are your target user’s pain points?
- Where does the problem usually appear? Is there a physical space where the user faces challenges? Is it the same space every time, or different?
- Why the problem matters is self-explanatory. It’s a problem.
First, ask your design team these questions. This approach ensures everyone can freely express their ideas about a product’s design.
Secondly, ask these questions of a focus group that fits your target audience or who you think could benefit from your product. You’re likely to get very different responses.
And that’s a good thing!
Finding common threads helps to flesh out the design problem and know who will benefit most from your solution.
The Five “Why’s” of the Design Problem Statement
The five why’s help you drill down even further to surface your customer’s core problem.
A great example comes from Taiichi Ono, the creator of the 5-Why Technique, and many consider the “father” of lean manufacturing:
- Why did the robot stop? A circuit has overloaded, causing a fuse to blow.
- Why is the circuit overloaded? There was insufficient lubrication on the bearings, so they locked up.
- Why was their insufficient lubrication on the bearings? The oil pump on the robot is not circulating enough oil.
- Why is the pump not circulating sufficient oil? Metal shavings clogged the pump intake.
- Why is the intake clogged with metal shavings? Because there is no filter on the pump.
See how these questions flow toward a resolution? Applying this method to your industrial design process helps formulate your design problem. And then complete competitive and market research to determine how that problem is best solved.
—-
Takeaway: A design problem statement helps identify the root issue your product seeks to solve. This process also prepares you for competitive research and market research which are essential to define your unique value proposition.
—-
Product Ideation
Product ideation allows product designers to work from a blank slate.
Design thinking doesn’t go in a straight line. Figuring out who needs a product, and why people need it can be a complicated process. It’s a necessary process, though, to develop a unique product with value and utility.
The Value of Product Ideation
Product ideation allows industrial design teams to work without assumptions. Assumptions, here, are the enemy of insights.
In the product ideation process, there are no bad ideas and no stupid questions. The goal is to brainstorm many ideas over quality ideas —the more insights on the table for your design team to consider during product ideation, the better. For example, whiteboarding is a best practice. One person is assigned to write down every idea team members come up with for a product, no matter how apparently silly or impractical. Dissecting ideas and asking tough questions is the next step.
Tapping into your team members’ knowledge is a great way to think differently about a product and its utility. After all, no one knows everything about every product. They have to ask “stupid” questions to uncover insights that could lead the design team down an unanticipated path. After the design thinking process is complete – with product ideation being the focus – designers have a ton of ideas from which to work. There’s still a long haul ahead, however.
Prototype development is the next step.
—-
Takeaway: The goal of product ideation is to brainstorm as many ideas as possible. It doesn’t matter if these product ideas are “quality” ideas. The more ideas generated in this process, the easier the next steps become.
—-
Prototype Development
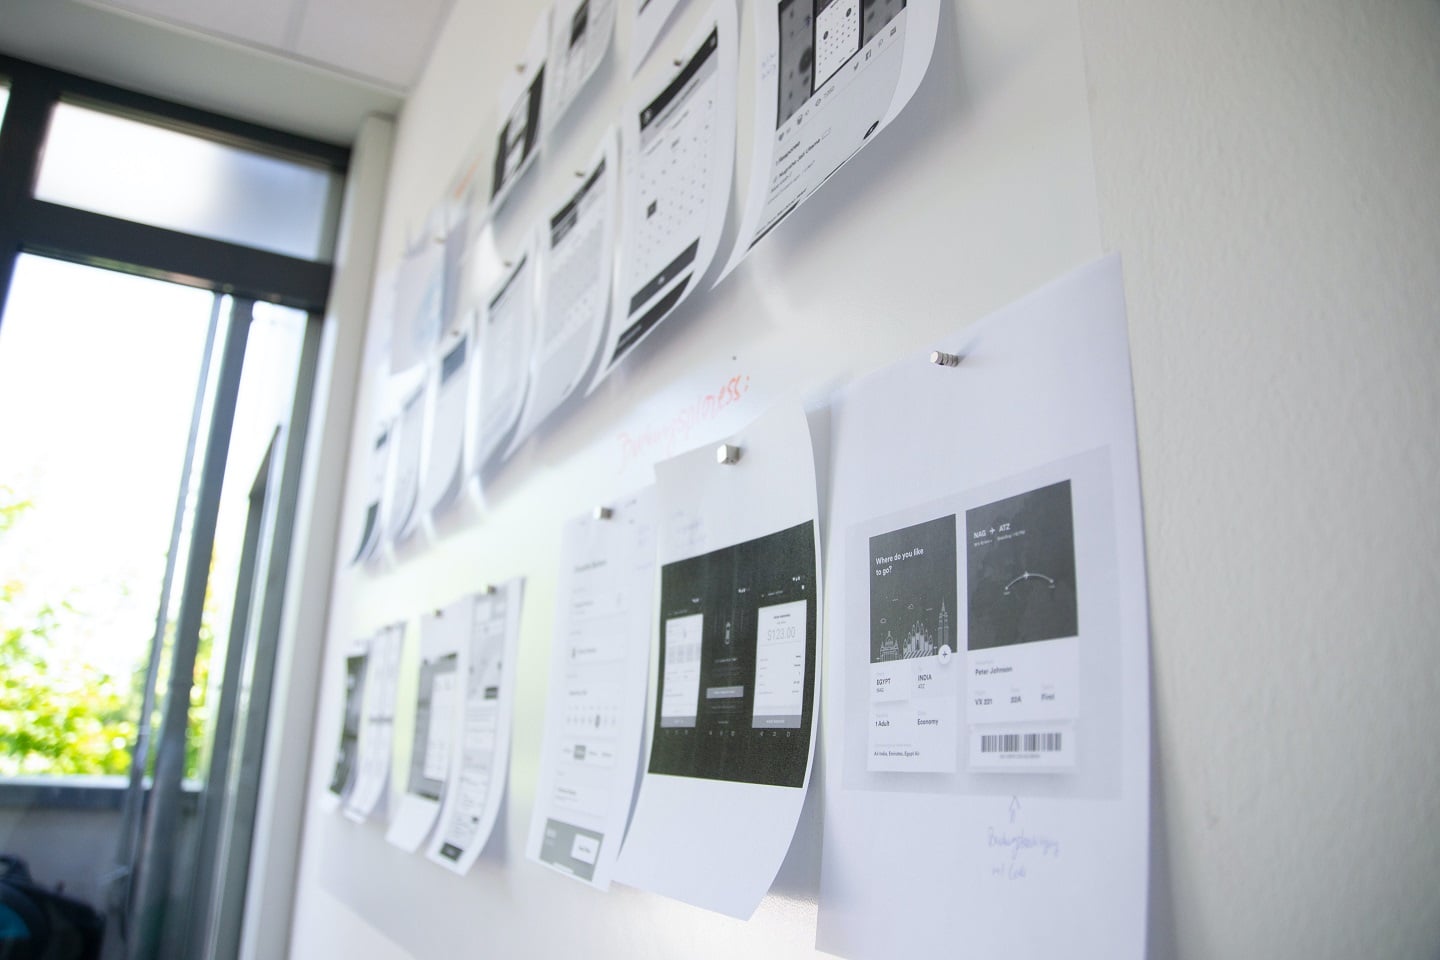
A prototype is an initial sample or product model used to test a concept or process. Evaluation of the sample is the culmination of the design process preceding it.
The sample is rough. It may not have clean edges, exact dimensions, an ideal weight, or match the color palette intended for the product when it goes to market. Regardless, for product designers, it’s vital to have a prototype to evaluate. Designers know a prototype is meant to be torn down and rebuilt, and won’t be perfect. They expect the initial prototype to “fail.” At a minimum, it should be functional, relatively precise, and simple enough to iterate so a second version will mirror the final product more closely.
Different categories of prototypes exist, and the product’s intended use aligns with these categories.
Prototyping Categories
The two primary types of prototypes are:
- Throwaway prototypes, and
- Evolutionary prototypes
Throwaway prototypes are what you might imagine. They are prototypes intended for single-use and a one-time evaluation. Throwaway prototypes are typical in industries where product designers operate on lean budgets or need to protect costs throughout the design process.
These prototypes are also occasionally used earlier in the product design process. Easy to toss back-of-napkin sketches are an example. While these prototypes are disposable, they allow for a faster prototyping process.
You’ve probably heard the term “minimally viable product” before. Well, throwaway products are an MVP.
Evolutionary prototypes are built to be altered and updated. These prototypes are more visually appealing and can be the center of presentations to stakeholders, including investors or a board of directors. As designers receive input from these stakeholders and implement changes, these prototypes evolve toward a more likely final product version.
Now we’ve covered how the product design process unfurls from start to finish let’s take a look at how we approach it for our clients at Gembah.
The Gembah Product Design Process
Phase 1: Establish the Product Design Vision and Goals
At the outset of establishing a product vision and the goals for the project, a Gembah client typically has a good idea of the product they want to create. Usually, this doesn’t include a detailed specification list of the exact features and functions they want.
Thus, the first step in any product design project is to establish a vision and goals for the project. The deliverable for this phase is a detailed product design problem statement.
A Gembah Senior Product Designer – working with the client and supported by a client account manager – creates this statement. It kicks off with a survey and interview with the client. Conducting this interview helps clarify how and why the client’s end-user will use the product.
The client also answers a series of questions that help our designer and account manager to document desired product use and function.
Gembah Design Problem Statement Elements
A typical product design problem statement answers the following questions:
- What is the concept? – What are the overarching idea and product concepts?
- Who? – Who is the target end-user?
- What? – What is the problem the user is trying to address and what are their main “pain points”?
- Where? – Where does the problem appear?
- Why? – Why is it essential for the user to solve this problem differently?
A sample design problem statement can look something like this:
- Concept: The purpose of this project is to develop a laptop that takes up less space.
- Who: People who work on the go need to conserve space in their bags as they move around the city.
- What: Although laptops can be light and thin, they still are too wide to fit in many bags.
- Where: This makes it difficult for programmers, writers, and creatives to work in tight spaces.
- Why: These people would like something that’s foldable to take up less space in their bags, and also for ease of use anywhere.
OR
- Concept: The purpose of this project is to design a better wine opener that is portable and easy to use.
- Who: Women sometimes struggle to open a nice bottle of wine.
- What: Current wine openers are either bulky and impractical to bring with you. They’re hard to use, require strength, and can be painful for your hands.
- Where: These challenges can make it difficult to open a wine bottle at a picnic, BBQ, or another outdoor event.
- Why: Women should not have to ask men to help open a wine bottle or ruin a picnic because nobody can open the wine they brought.
With the product vision and design problem statement complete, it’s time to get creative and generate multiple product concepts.
This process is the core of the Product Concept Definition phase.
Phase 2: Product Concept Refinement
The purpose of Phase 2 is to translate the product design problem statement into multiple product concepts. Based on the complexity of the design, Gembah assigns the perfect team of experts for that product type. This team will have significant experience designing products in the product category. For simple designs, it may be an individual. An electrical engineer will work on the product if it contains electronics, and, similarly, a mechanical engineer will work on a product if it has mechanical elements.
Gembah’s extensive network of product designers is a great resource. It allows us to find an expert whose category experience aligns with the product type we’re working on for our customers.
This refinement phase also includes researching material and finish options.
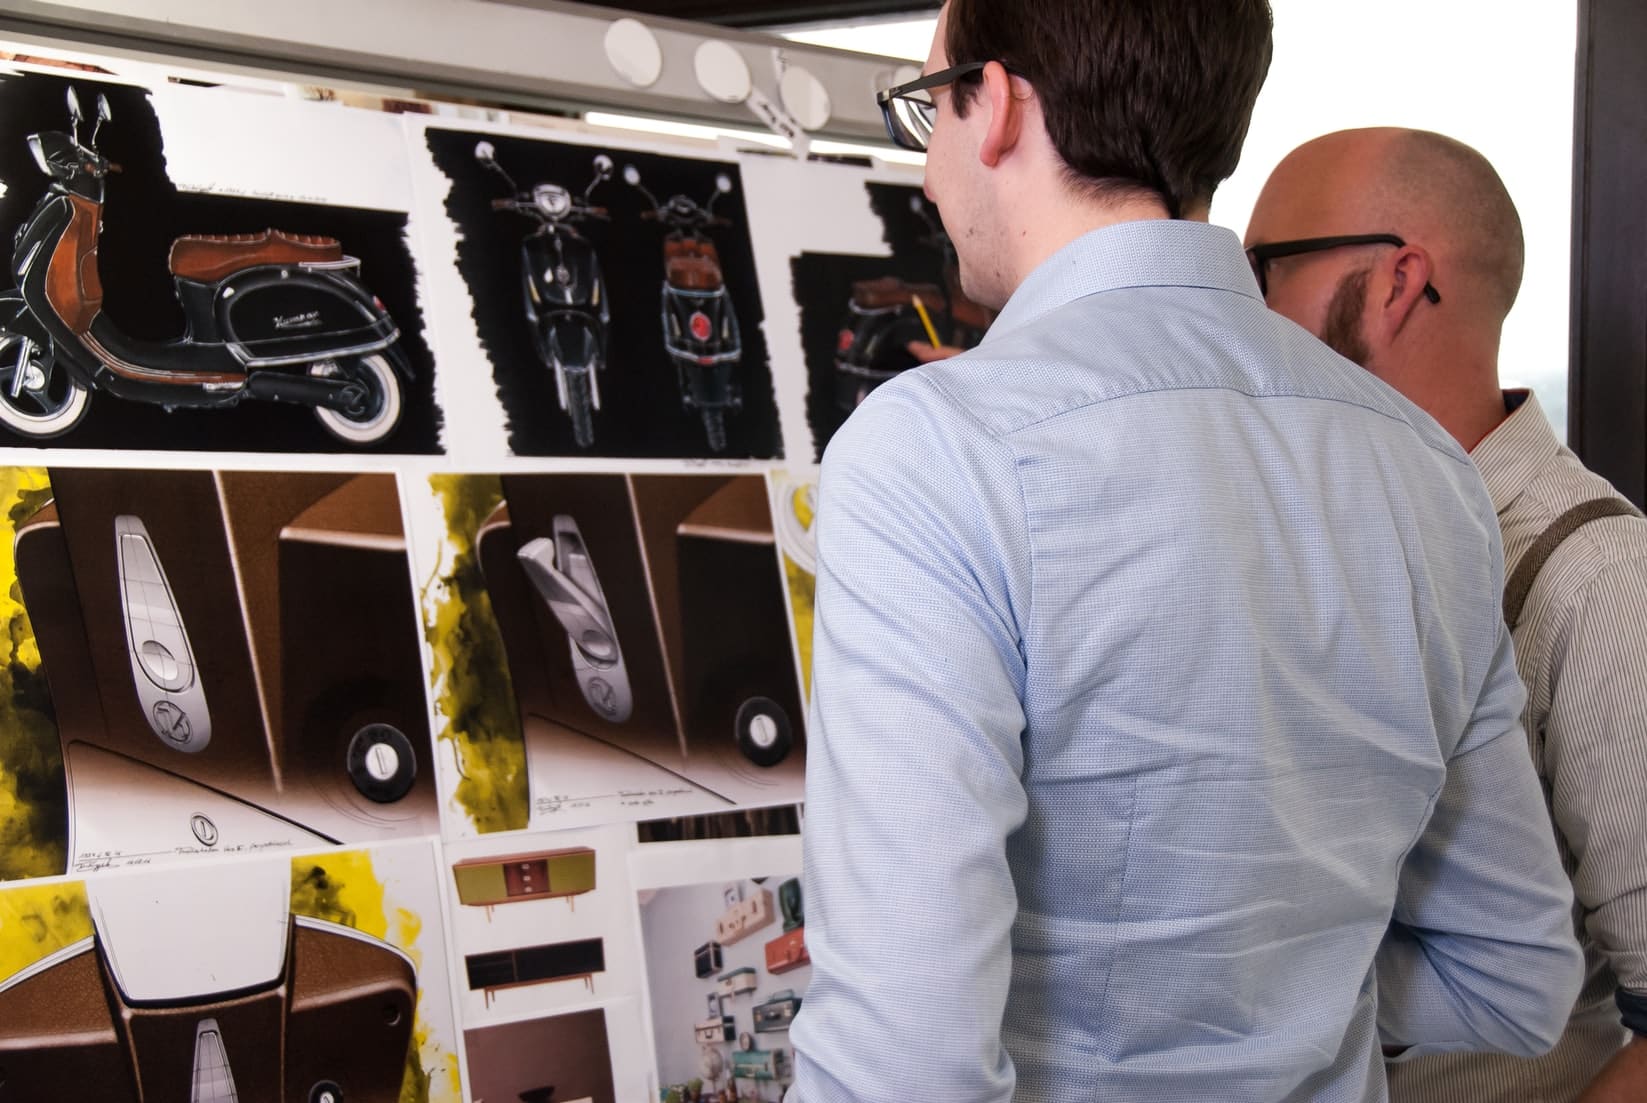
A typical project includes a presentation of three to five concepts by our design team. Our client reviews these concepts and provides comments and feedback. To complete the phase, our team addresses feedback and provides a product concept with a full 2D rendering.
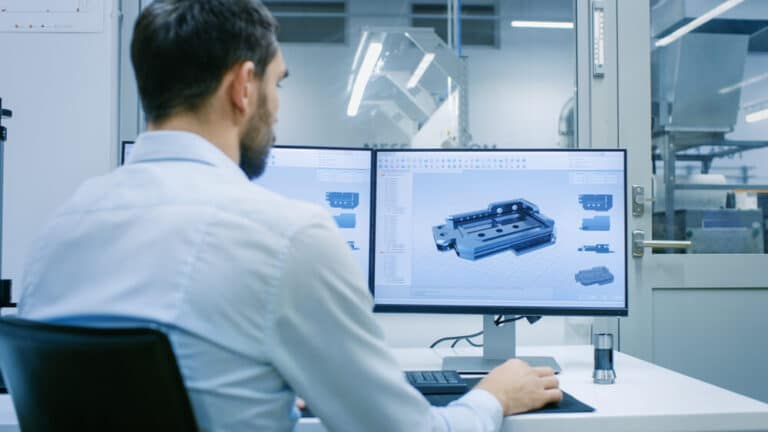
Phase 3: Product 3D Modeling
Once the client has selected a specific product concept design, it’s time to translate it from 2D rendering – which is essentially a product drawing – into a manufacturable 3D design.
If you were to bring the 2D rendering to a factory and ask them to make the product, they would not know where to start. And, even if they were willing to try, they would not know how you expect the product to work, or what materials to use. This phase is about developing detailed specifications that turn an idea into a 3D model, that eventually becomes a real product. A complete 3D model ensures the product looks right and works according to our client’s specifications. It’s the primary deliverable for this phase.
Another important deliverable in this phase is working files with fully-manipulated master sketches. The engineering team uses these in the next stage to finalize the design for manufacturing.
Product 3D Modeling Steps
The steps included in the product 3D modeling stage include:
- 3D computer-aided design (CAD) work
- 3D renderings
Depending on the complexity of product design, the steps are often iterative. The typical product goes through a few iterations to reach the final 3D product design. This phase can take anywhere from a few days and a single iteration for a simple product to several weeks and multiple iterations for a more complex product.
Phase 4: Product Engineering and Manufacturing Specification
Once the team has finalized the 3D design and specified all functions and features, it’s time to translate that 3D design into a manufacturing specification. Factories use this spec to quote product costs accurately and produce it in large quantities.
The primary goal of this phase is to engage engineering teams to finalized the detailed specification that defines:
- Exact dimensions
- Performance requirements, and
- Assembly instructions
This phase’s deliverables are the technical CAD spec and a bill of materials (BOM). The BOM identifies the materials used and the process for making each product sub-component.
The product design process concludes once we have the BOM in hand, and we’re ready to move on to factory sourcing and product manufacturing.
Product design is a complicated process that can be full of pitfalls, but with a strong understanding of the steps involved, it’s not as intimidating as it seems on the surface.